TORONTO • BRAMPTON • MISSISSAUGA

416-651-8111

Award badge recognizing Right Choice Roofing and Repair as Toronto’s top roofing company for roof repair, roof replacement, and slate roofing
Top 3 Roofing Company in Toronto 2024 award badge recognizing Right Choice Roofing and Repair for residential and commercial roofing excellence.
Best of Trusted Pros 2020 award badge recognizing Right Choice Roofing and Repair as Toronto’s top roofing company for roof repair, roof replacement, and slate roofing.
BBB Accredited Business badge for Right Choice Roofing and Repair, Toronto’s top roofing company for roof repair, roof replacement, and roof maintenance.

Top Rated Reviews
4.9 Stars

Call for a Quote
416-651-8111

The Hidden Cost of Mature Trees Around Toronto Homes: What Every Homeowner Should Know

July 19, 2026

Beautiful Trees. Hidden Costs. What Every Toronto Homeowner Should Know About Mature Trees and Protecting Their Home

Toronto’s Trusted Local Roofer

By Frank Gillis
Owner, Right Choice Roofing and Repair

Helping Toronto homeowners understand how mature trees can affect roofs, wildlife access, gutters, moss growth, storm damage, insurance claims, and long-term home maintenance.

Serving Toronto since 2007.

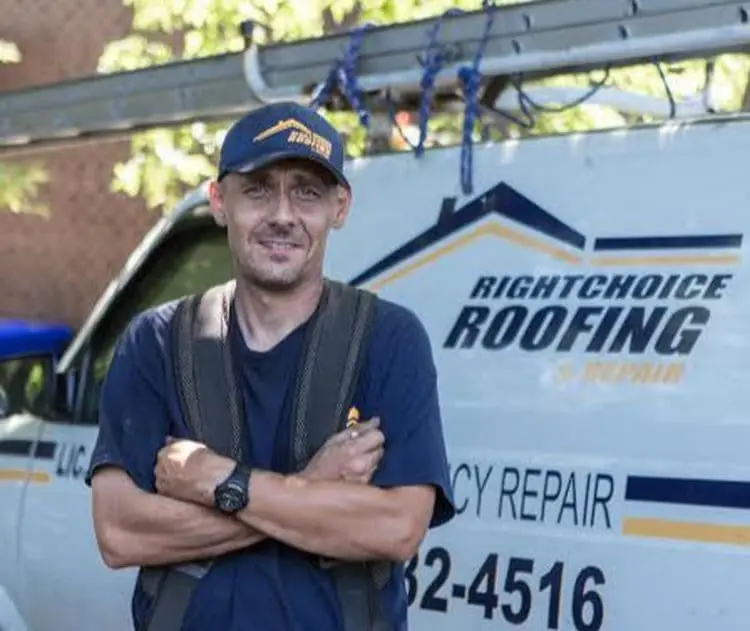
Frank Gillis, owner of Right Choice Roofing and Repair, Premiere Toronto Flat Roofer since 2007

Why Mature Trees Can Become One of the Most Overlooked Threats to Toronto Homes

Walk down almost any street in Forest Hill, Rosedale, or The Kingsway and the first thing you notice isn’t the houses — it’s the canopy over them. Toronto’s mature trees are part of what makes these neighbourhoods feel the way they do. They cool the street in July, drop the air conditioning bill, and add real dollars to a home’s resale value.

They’re also, quietly, one of the more common sources of roof trouble in this city.

None of what follows is an argument for cutting trees down. It’s the opposite, actually — the City of Toronto has a canopy target of 40 per cent cover by 2050 and points to more than $55 million a year in ecosystem benefits from the urban forest, including stormwater reduction and lower energy use (City of Toronto). Mature trees are worth keeping. But keeping one 40 feet from your roofline means understanding what it’s doing to that roof, year after year, whether you’re watching for it or not.

Table of Contents

  • Why Toronto’s Trees Are Worth Protecting
  • How Branches Physically Wear Down a Roof
  • The Bridge Problem: Wildlife and Overhanging Trees
  • Gutters, Debris, and Ice Damming
  • Leaves Can Affect More Than Your Gutters
  • Moss, Algae, and the Shade Problem
  • When Storms Turn Trees Into Hazards
  • Emerald Ash Borer and Toronto’s Changing Canopy
  • Branches, Masonry, and Your Chimney
  • What Your Insurance Actually Covers
  • Toronto’s Private Tree Bylaw: What Homeowners Need to Know
  • Seven Mistakes Toronto Homeowners Make Around Mature Trees
  • A Seasonal Tree-and-Roof Checklist
  • Annual Inspection Timeline
  • Frequently Asked Questions
  • Conclusion

Why Toronto’s Trees Are Worth Protecting

Before getting into the damage side of things, it’s worth being honest about the benefits, because they’re real and they matter more than most homeowners realize.

Mature trees shade a roof and walls directly, which lowers cooling costs in summer. They intercept rainfall, easing pressure on the city’s stormwater system. They filter particulate matter out of the air. And in a city where the urban heat island effect can push rooftop surface temperatures well above ambient air temperature, a healthy canopy is doing real work.

There’s also a wildlife-habitat argument that’s easy to forget when a squirrel is chewing through your Soffit: birds, pollinators, and small mammals depend on mature urban trees in a city with limited natural space. And on the financial side, appraisers and real estate agents in leafy Toronto neighbourhoods will tell you mature trees add measurable value to a property — sometimes more than most landscaping investments a homeowner could make instead.

All of that is true at the same time as everything below. This isn’t a case for removing a tree near your house. It’s a case for knowing what it’s doing so you can stay ahead of it.

How Branches Physically Wear Down a Roof

Abrasion and Granule Loss

The most common and least dramatic form of tree damage is also the slowest. When a branch hangs close enough to touch the roof, even a light breeze drags it across the Shingle surface. Asphalt Shingles are coated with a layer of ceramic granules that block UV rays and give the Shingle its colour and its protection. Constant light scraping acts like sandpaper on that layer.

Once the granules are gone in a given spot, the asphalt underneath is exposed directly to sunlight, and that section of roof ages faster than the rest of it — sometimes years faster. It’s not usually obvious from the ground. It shows up as a patch of darker, rougher-looking Shingle where a branch has been sweeping back and forth for a few seasons. Once bare patches like this show up, it’s a job for Roof Repair rather than something to leave until the next full replacement.

Did you know? A branch doesn’t need to break to damage a roof. Even light rubbing during windy conditions can gradually remove the protective ceramic granules from asphalt Shingles over time — long before anyone notices a problem from the ground.

Dead Branches, Ice Load, and Wind

The more sudden version of tree damage is a branch that simply comes down. Dead or weakened limbs can snap under their own weight, under an ice load in winter, or in a wind event — and when they land on a roof, the result ranges from a few cracked Shingles to a punctured deck, depending on the size of the branch and how far it fell.

This is also where roof type matters. Slate is more brittle under a direct impact than asphalt, and a falling limb can crack or shatter individual tiles. Metal roofing dents rather than punctures in most cases, but a dent at a seam can still open a path for water. Flashing around chimneys, valleys, and dormers is thinner than the field of the roof and tends to take the worst of it when debris lands directly on it.

Recommended Clearance

Most roofing and arborist guidance lands in the same range: aim for six to ten feet between the nearest branch tip and the roofline. That’s enough space to stop the scraping, cut off the easiest wildlife access (more on that below), and reduce how much storm debris ends up directly on the roof surface. It’s also usually achievable with routine pruning rather than anything drastic — this is maintenance, not removal, and a Roof Inspection is a good time to get an honest read on how close is too close for your specific roof.

Sap and Solar Panels

Sap deposits from certain species — maples and some conifers in particular — can bake onto Shingles in summer heat and are difficult to remove without damaging the granule layer. On homes with solar panels, overhanging branches cut into panel efficiency in two ways: direct shading reduces output, and sap or leaf debris settling on the panel surface reduces it further until it’s cleaned. Neither is usually severe on its own, but together they’re a real, measurable efficiency loss over a season.

The Species Toronto Homeowners Actually Have

This isn’t abstract for most readers — it’s usually one specific tree in the backyard. The Norway Maple is probably the most common offender in Toronto’s older neighbourhoods, and for a specific reason: its canopy is unusually dense and wide compared to native maples, which means it casts a deeper, more consistent shadow. On a north-facing roof slope, that’s exactly the low-sunlight, high-moisture microclimate moss needs to establish itself, which is why homes under a mature Norway Maple tend to show moss problems years before a similarly shaded home under a thinner-canopied tree would.

Oak and Honey Locust trees create a different kind of problem, mostly in the gutters rather than on the Shingle surface. Their debris — small leaflets, catkins, and fine seed pods — doesn’t blow off a roof the way a large maple leaf often does. Instead it settles into gutters and compacts into a dense, compost-like sludge that packs into corners and downspout openings far more thoroughly than bigger leaves would.

Here’s how the most common species around Toronto properties tend to show up as roof problems:

Tree Common Issue
Norway Maple Dense shade, moss on north-facing slopes
Silver Maple Weak limb attachments, more prone to storm breakage
Oak Heavy leaf drop and catkins that pack into gutters
Honey Locust Fine debris that clogs gutters and downspouts
White Pine Needle drop plus sap accumulation on Shingles
Spruce Sap and near-constant year-round shade
Ash Emerald Ash Borer damage and unpredictable dieback

It’s a different failure mode for each species, but the underlying lesson is the same: the specific tree in a yard changes which problem shows up first.

The Bridge Problem: Wildlife and Overhanging Trees

This is the connection most homeowners don’t make until they’ve already got a problem: a tree touching or overhanging the roof isn’t just a maintenance issue. It’s an access route.

Squirrels, raccoons, and birds don’t typically climb the side of a house. They walk across a branch and step directly onto the roof. From there:

  • Squirrels chew through Shingles, Soffit, and fascia to reach attic insulation, and will gnaw on electrical wiring once inside — a real fire risk, not just a nuisance.
  • Raccoons are strong enough to physically peel back Shingles and tear open Soffit panels, particularly around chimneys and roof edges, especially during spring and fall denning season.
  • Birds use branches as a runway into eaves, ridge vents, and soffit vents, and their nesting material blocks the ventilation those vents are there to provide.
  • Chipmunks are less destructive structurally but will still exploit any gap a Squirrel or bird has already widened.

The City of Toronto’s own wildlife resources note how common this pattern is across the city’s parks, ravines, and residential canopy (City of Toronto – Wildlife in the City), and it lines up with what shows up on roof inspections here constantly: the entry point is almost always near a spot where a branch gives easy access.

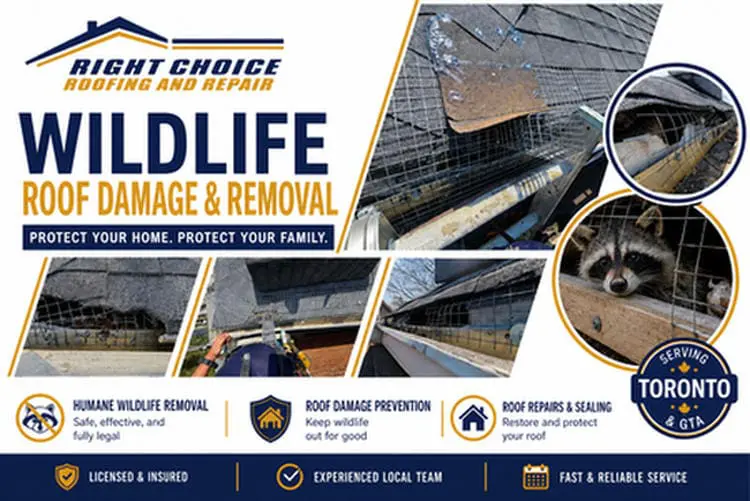
The fix is the same clearance recommendation as above — six to eight feet minimum between branch tips and the roof edge — plus sealing any existing gaps at Soffit, Fascia, and vent covers before an animal finds them. If wildlife has already gotten in, our Wildlife Removal service handles both the removal and the roof repair that closing the entry point properly requires. We’ve also written a more detailed breakdown of wildlife-specific roof damage and prevention if that’s the issue you’re dealing with right now: Wildlife Roof Damage in Toronto: Prevention and Repair.

Gutters, Debris, and Ice Damming

Trees close to a roofline are the single biggest source of gutter blockages in this city’s older, tree-heavy neighbourhoods. Leaves, seed pods, twigs, and needles fall directly into open gutters and pack down into a dense, water-holding mat that a simple rinse won’t clear.

Blocked gutters cause two separate problems. In the growing season, water backs up at the eave line instead of draining, which keeps that section of roof damp longer than it should be — feeding exactly the kind of moss and algae growth covered below. In winter, the same blockage contributes directly to ice damming: melting snow refreezes at the eave because it has nowhere to drain, building a ridge of ice that can force water back up under the Shingles.

Regular gutter cleaning — ideally after leaf drop in fall and again after any major spring storm — is one of the cheapest and most effective things a homeowner with mature trees nearby can do. It’s also, notably, one of the maintenance items insurers specifically look for when deciding whether a claim gets paid, which is covered in more detail below.

Homeowners with Oak or Honey Locust trees nearby will notice this problem faster than most, since the fine catkins and leaflets those species drop don’t behave like larger maple leaves — they settle into the gutter and compact into a dense, sludge-like layer that clogs corners and downspout screens even when the gutter doesn’t look full from the ground.

A quick reality check on gutter guards: they help with large leaves, but they don’t solve this problem on their own. Pine needles, sap, and fine debris like oak catkins can still coat the top of the mesh or work through the gaps, and once that layer builds up it creates a shelf where ice forms even faster in a Toronto January. Guards reduce how often gutters need cleaning — they don’t remove the need to check them.

Leaves Can Affect More Than Your Gutters

Gutters get most of the attention, but they’re not the only opening on a roof that leaf and needle debris can compromise. Every roof has several points designed to let air move in and out of the attic, and trees close to the house put all of them at risk in slightly different ways:

  • Ridge vents, running along the peak of the roof, can have their narrow openings packed with wind-blown leaf fragments and needles over time.
  • Roof-mounted vents and turbine vents have louvres or screens that catch debris the same way a gutter does, just in smaller quantities that are easier to miss from the ground.
  • Plumbing stack vents are narrower still, and a build-up of debris or a bird’s nest at the opening can restrict airflow with surprisingly little material.

When any of these get partially blocked, the attic’s intended airflow — cool air in low, warm air out high — breaks down. The practical results stack up:

  • Reduced airflow means the attic no longer vents moisture the way it’s designed to.
  • Higher attic humidity follows, especially in winter when indoor moisture rises into the attic space.
  • Condensation forms on the underside of the roof deck and on rafters once humid air meets a cold surface.
  • Mould potential increases wherever that condensation sits for long enough — often on the north side, where things dry out slowest.
  • Higher cooling costs show up in summer, since a poorly ventilated attic traps heat instead of releasing it, pushing warm air back into the living space below.

This is a genuinely under-covered topic in most homeowner guides, and it’s exactly the kind of thing that only becomes obvious once an attic inspection turns up damp insulation or the first hint of a musty smell. A Roof Maintenance visit that includes a look at vent condition and clearance is worth doing on the same schedule as gutter cleaning, not as an afterthought. For a longer look at how heat and poor ventilation interact with Toronto’s climate specifically, see Summer Heat Roof Damage: Toronto Prevention Guide, which covers the summer heat side of this same ventilation problem in more depth.

Moss, Algae, and the Shade Problem

Here’s where Toronto’s specific mix of climate, tree canopy, and shingle chemistry creates a problem that’s genuinely more common in some neighbourhoods than others.

Moss and algae need two things to establish themselves on a roof: consistent moisture and limited sunlight. Mature tree canopy provides both — shade keeps a roof section damp for hours longer after rain or dew than an exposed section would stay, and most Shingles sold in Ontario use a limestone filler that, as it happens, is a food source for the algae species most commonly found on Canadian roofs.

North-facing slopes are the most vulnerable, since they get the least direct sun exposure through the day. Neighbourhoods with heavy, mature canopy — High Park, Forest Hill, Lawrence Park, Rosedale, The Kingsway, Moore Park, and Wychwood among them — see this pattern more often than newer, less-treed subdivisions simply because there’s more shade sitting on the roof for more of the day.

Left alone, moss doesn’t just look bad. It holds moisture directly against the Shingle surface, which accelerates granule loss and, over years, shortens the usable life of the roof.

[Infographic placement: “How Moss Actually Damages a Roof” — a four-step cross-section already built for this section; see Image Suggestions below for the full production spec.]

A Note on Cleaning Methods

Most major asphalt Shingle manufacturers caution against pressure washing, because it can damage Shingles, remove protective granules, and may affect warranty coverage if the roof is damaged by improper cleaning. Homeowners should always follow the maintenance recommendations published by their specific Shingle manufacturer before attempting to remove moss or algae themselves. A low-pressure soft wash with a roof-safe solution, applied and left to work over a day or two, is the approach most manufacturers describe as appropriate — but the manufacturer’s own published guidance is the one to follow, since it varies by product line.

Longer term, homeowners replacing a roof under heavy shade should specifically ask about algae-resistant (AR) Shingles, which use copper granules blended into the surface to continuously discourage algae growth for the life of the Shingle. Zinc or copper strips installed along the ridge of an existing roof are another option — rainwater running over them picks up trace metal ions that are toxic to moss and algae, and a properly installed strip lasts fifteen to twenty years.

When Storms Turn Trees Into Hazards

Toronto sees its share of spring and fall wind events, summer microbursts, and winter ice storms, and mature trees are frequently where the damage starts. A weak or dead branch that’s been fine for years can come down without warning in the right (or wrong) conditions, and when it lands on a roof, the damage is often more severe than the same-sized limb landing during a calmer wind because it’s typically travelling with more force in a storm.

After any significant wind or ice event, an inspection from the ground — or, better, a professional Roof Inspection if there’s any visible debris or dislodged Shingles — is worth doing before the next rain finds a new leak. This is also the point where the insurance conversation below becomes directly relevant, since storm-related tree damage is one of the more clearly covered categories under a standard Ontario homeowner policy.

What to Look For From the Sidewalk

A pair of binoculars and five minutes on the sidewalk once or twice a year catches most of what matters, without anyone needing to get on a ladder. Specifically:

  • Curling or lifted Shingles right at the roof edges — this is usually the first visible sign of a raccoon starting to pry at a section, well before it’s torn open.
  • Dark streaks or green patches on the north-facing slope — the earliest visible stage of algae or moss, before it’s spread far enough to be an obvious problem.
  • Shiny, dark patches on Shingles directly under overhanging branches — this is baked-on sap, and it’s worth noting the exact spot so it can be checked against granule wear at the next professional inspection.

None of these require climbing anything. They’re just worth knowing what to look for.

Emerald Ash Borer and Toronto’s Changing Canopy

One threat to the canopy itself deserves a mention, because it changes the risk profile of a specific class of trees across the city: the Emerald Ash Borer. This invasive beetle attacks and kills ash trees, and Toronto has been managing its spread for years now under an active City program (City of Toronto – Emerald Ash Borer).

The practical concern for a homeowner is straightforward: a dead or dying ash tree becomes structurally unpredictable well before it looks obviously dead from the ground, and dead branches on an infested ash are exactly the kind of hazard described above — except concentrated on a tree that’s actively declining rather than just aging. If there’s a mature ash on or near the property, it’s worth having a certified arborist assess its condition rather than waiting for visible signs of decline.

Branches, Masonry, and Your Chimney

The chimney is easy to overlook in all of this, but it’s often the part of a roof that takes the most sustained abuse from a nearby tree, simply because it’s the tallest, hardest fixed point on the roofline.

  • Branches rubbing against masonry wear down mortar joints the same way they wear down Shingle granules — slowly, and mostly out of sight from the ground. Over years, this accelerates the natural deterioration of brick and mortar.
  • Chimney caps are a common landing and entry point for raccoons and birds using an overhanging branch as their route onto the roof; a damaged or missing cap turns the chimney into an open invitation.
  • Flashing around the base of the chimney is one of the thinnest, most failure-prone parts of any roof, and falling debris or constant branch contact right at that joint is a common source of leaks that show up nowhere near where the water actually enters.
  • Mortar joints and brick deterioration develop faster wherever moisture is held against the masonry longer than it should be — including moisture trapped by nearby branches blocking sun and airflow around the chimney itself.

A chimney showing any of these signs is worth having assessed alongside the rest of the roof rather than on its own — the causes are frequently connected. If the chimney itself has reached the end of its useful life, our Chimney Removal service handles that properly, including the roof repair work that closing it off safely requires.

What Your Insurance Actually Covers

This is the section that surprises the most homeowners, because the coverage line isn’t always where people assume it is.

According to Insurance Bureau of Canada, standard home insurance policies generally cover damage caused by wind or hail, and that coverage specifically extends to damage caused by flying debris or falling branches or trees (Insurance Bureau of Canada – Hail and Insurance). In plain terms: if a storm brings a limb down onto the roof, that’s typically the kind of sudden, accidental event a standard policy is built to cover.

Where it gets less generous is anything that reads as gradual or preventable. Moss growth, slow granule loss from years of branch abrasion, and gutter overflow caused by a blockage that was never cleared all tend to fall on the “maintenance” side of the line rather than the “sudden event” side — and insurers routinely deny claims where the underlying cause looks like years of neglect rather than a single storm. We’ve seen this play out with ice dam claims specifically — see Repair or Replace? What Every Toronto Homeowner Needs to Know for real examples of how that distinction played out for local homeowners this past winter.

A few practical takeaways:

  • Document proactively. Photograph the roof once a year, ideally from the same angles, so there’s a dated record of its condition before any storm.
  • Keep gutter-cleaning records. If a claim ever comes down to “was this maintained,” having dates and receipts for gutter cleaning and tree trimming works in the homeowner’s favour.
  • Report storm damage quickly. Most policies expect prompt notification after a covered event, and delayed reporting can complicate a claim even when the underlying damage would otherwise be covered.
  • Ask specific questions before you need to. IBC’s Severe Weather Centre is a useful place to review general coverage categories and prepare questions for your own broker (IBC – Severe Weather Centre).

None of this is legal or insurance advice — every policy is different, and the only way to know exactly what’s covered on a given property is to review the actual policy wording with a broker or insurer directly.

Toronto’s Private Tree Bylaw: What Homeowners Need to Know

If a roofing job on your property will involve a ladder, scaffolding, or material staging anywhere near a mature tree — or if part of the plan involves trimming a branch to protect the new roof — this bylaw is worth understanding before work starts, not after. If the property is also heritage-listed or heritage-designated, there’s a second layer to check as well — see Ontario’s 2027 Heritage Property Deadline: What Toronto Homeowners Should Know Before Roof Work for how that timeline can affect a roofing project that’s already navigating tree protection rules.

[Infographic placement: “Toronto Private Tree Bylaw at a Glance” — a three-tier visual already built showing the 30 cm and 61 cm thresholds, the Tree Protection Zone concept, and the maximum fine; see Image Suggestions for the full spec.]

The 30 cm Rule

Under the City’s Tree Protection By-law, any tree on private property with a trunk diameter of 30 centimetres or more (measured at 1.4 metres above ground) is protected. Any activity that could injure or remove that tree — including construction-related work like scaffolding, material storage, excavation, or root disturbance within its Tree Protection Zone — requires a permit first (City of Toronto – When to Apply For a Tree or Ravine Permit). Routine pruning done to maintain a tree’s health generally does not require a permit, but significant pruning or anything that could injure the tree does.

The Tree Protection Zone itself scales with the tree’s size — for a tree in the 30–40 cm range, the City specifies a minimum 2.4 metre protected radius on private property, increasing from there as the trunk gets larger.

Fines and Enforcement

Removing or injuring a protected tree without authorization can carry fines up to $100,000 per tree, along with a requirement to plant replacement trees. This isn’t a theoretical number — it’s the maximum penalty under the bylaw, and enforcement has been getting more consistent, not less, in recent years.

Bylaw Cheat Sheet: Trunk Size vs. What You Can Do

For anyone scanning this before a roofing project rather than reading it start to finish, here’s the same information as a quick reference:

Tree Trunk Diameter (at 1.4 m high) Current Protection Status New Rules (Starting Sept 1, 2026) Impact on Your Project
Under 30 cm Not protected by City bylaw Endorsed in principle to lower to 20 cm soon Generally clear to trim or work around safely.
30 cm to 61 cm Protected Standard permit rules apply Scaffolding or heavy staging near the root zone requires a Tree Protection permit.
Over 61 cm Protected New “Distinctive Tree” Category Extra scrutiny during permit review; highly unlikely to get removal approved for a roof layout.

This table is a starting point for a conversation with the City or an arborist, not a substitute for one — always confirm the exact diameter and Tree Protection Zone for a specific tree before finalizing a project plan.

What’s Changing in 2026

The City completed a formal Tree Bylaw Review in 2026, and several changes take effect September 1, 2026, worth knowing about now:

  • A new Distinctive Tree Category will apply extra protection to healthy private trees over 61 cm in diameter, requiring their status to be specifically considered during any permit review.
  • Stump diameter of 40 cm or more can now be used as secondary evidence when a removed tree’s trunk can no longer be measured — closing a loophole that used to make some violations harder to enforce.
  • City Council has also endorsed, in principle, lowering the minimum protected size from 30 cm down to 20 cm, though that change still needs a detailed implementation report before it takes effect.

Full details on the review, including the complete list of upcoming changes, are available directly from the City (City of Toronto – Tree Bylaw Review).

What This Means for a Roofing Project

In practice, this rarely stops a job — it just means confirming, before work starts, whether a protected tree sits close enough to the work area that a permit is needed. The responsibility for the permit sits with the property owner, not the contractor, but a good contractor will flag it before scaffolding goes up rather than after. If a job genuinely requires trimming a branch that’s contributing to roof damage, that’s worth raising with the City or a certified arborist as part of the plan — not something to handle quietly on the day of the job.

Seven Mistakes Toronto Homeowners Make Around Mature Trees

Most tree-related roof problems trace back to one of the same handful of avoidable decisions:

  1. Waiting until branches touch the roof before doing anything about them, instead of trimming at the 6–10 foot clearance mark while it’s still routine maintenance.
  2. Ignoring gutters because they don’t look full from the ground, when the real blockage is often packed down below the visible rim.
  3. Pressure washing moss off Shingles, which strips granules and can affect warranty coverage rather than solving the underlying shade problem.
  4. Assuming insurance covers everything tree-related, when the coverage line actually falls between sudden storm damage and anything that reads as years of neglect.
  5. Feeding wildlife, intentionally or not, which draws squirrels and raccoons closer to the house and makes an existing branch-to-roof bridge far more likely to get used.
  6. Ignoring a declining ash tree, on the assumption that a tree that still has leaves can’t be a structural risk, when Emerald Ash Borer damage often isn’t visible until the tree is already unpredictable.
  7. Cutting a protected tree without checking City requirements first, which can turn a straightforward roofing project into a bylaw contravention with real fines attached.

None of these are complicated to avoid. They’re just easy to put off, which is exactly why they show up so often.

Why Prevention Is Cheaper Than the Alternative

Without getting into specific dollar figures, the pattern is consistent: replacing damaged Fascia is usually far more involved than cleaning gutters would have been. Repairing a wildlife entry point — Soffit, insulation, wiring, sometimes drywall — is a much bigger job than the branch clearance that would have prevented an animal from reaching the roof in the first place. In almost every case here, the fix that comes early is smaller than the one that comes later.

A Seasonal Tree-and-Roof Checklist

Spring

  • Inspect for winter storm damage — cracked branches, dislodged Shingles, and gutters clogged with over-winter debris.
  • Schedule pruning for dead or weak branches before summer storm season.
  • Check for early signs of moss or algae on shaded, north-facing slopes.

Summer

  • Watch for sap accumulation on Shingles and, if applicable, on solar panels.
  • Confirm gutters are still clear after spring growth and any early storms.
  • Have an arborist assess any tree showing dieback, especially ash trees.

Fall

  • Clean gutters after leaf drop — ideally more than once if the canopy is heavy.
  • Trim branches back to the 6–10 foot clearance range before winter loading begins.
  • Do a full roof inspection before the first snow, checking flashing and valleys where debris tends to collect.

Winter

  • Watch for ice buildup at the eaves, particularly under sections shaded by trees.
  • After any ice storm or heavy wind event, do a ground-level visual check for new debris or damage.
  • Keep photos of any storm event that could later become an insurance claim.

Annual Inspection Timeline

The seasonal checklist above covers the big-picture rhythm. Here’s the same idea broken down by month, for anyone who’d rather have a standing reminder than four seasonal blocks:

  • January — Watch for ice buildup at the eaves and any new debris after winter storms.
  • February — Check for ice dams forming under shaded, tree-covered sections specifically.
  • March — Look for winter damage as snow clears: cracked branches, lifted Shingles, sagging gutters.
  • April — Schedule pruning for any dead or weak branches before they leaf out and hide storm damage.
  • May — Check gutters after spring bud and flower drop, which can be surprisingly heavy on some species.
  • June — Watch for early moss or algae growth on north-facing slopes as humidity rises.
  • July — Check for sap accumulation on Shingles and solar panels during peak heat.
  • August — Have an arborist assess any tree showing signs of stress or dieback, ash trees especially.
  • September — Begin fall gutter cleaning as the first leaves start coming down.
  • October — Do a full roof inspection before the first snow, checking flashing, valleys, and vent clearance.
  • November — Finish trimming branches back to a safe clearance before winter loading begins.
  • December — Photograph the roof for the year’s insurance record before winter storm season peaks.

Keeping this on a repeating calendar reminder is a small habit that heads off most of what’s covered above.

Frequently Asked Questions

Does home insurance cover a tree falling on my roof in Ontario? Generally yes, when the tree comes down as part of a sudden event like a windstorm or ice storm. Insurance Bureau of Canada specifically notes that standard wind and hail coverage extends to damage from flying debris or falling branches and trees. What isn’t typically covered is damage that built up gradually — for example, years of a branch scraping Shingles, or a leak that developed because a known problem was never addressed. The distinction insurers draw is between a sudden, accidental event and a maintenance issue, and that line matters a lot when a claim is being assessed. Every policy differs, so the only way to know exactly what’s covered on a specific property is to review the wording directly with a broker, ideally before anything happens rather than during a claim.

How close can a tree be to a house in Toronto? There’s no single bylaw distance that applies to every situation, but roofing and arboriculture guidance generally recommends six to ten feet of clearance between the nearest branch tip and the roofline. That’s enough to stop abrasion damage, cut off the easiest routes for wildlife, and reduce debris landing directly on the roof. Separately, the City’s Tree Protection Zone requirements set out minimum protected distances around a tree’s trunk for construction work, scaling from 2.4 metres for a 30–40 cm tree upward as the trunk gets larger — a different measurement for a different purpose, but relevant if any work near the tree is planned.

Do I need a permit to trim a tree in Toronto? Routine pruning done according to good arboricultural practice, to maintain the tree’s health, generally does not require a permit. Significant pruning, or any activity that could injure a protected tree — one with a trunk 30 cm or more in diameter — does require a permit under the City’s Tree Protection By-law. If there’s any doubt about whether planned work crosses that line, the City recommends calling 311 or consulting a certified arborist before starting.

What is the fine for cutting down a tree in Toronto without a permit? Fines for unauthorized removal or injury of a protected tree can reach up to $100,000 per tree under the City’s bylaw, and the City can also require replacement planting on top of any fine. Enforcement has become more consistent in recent years, and the 2026 Tree Bylaw Review introduced additional evidence-collection tools, including the ability to use stump diameter as proof when a removed tree’s trunk can no longer be measured directly.

Does moss on a roof actually cause damage, or is it just cosmetic? It’s more than cosmetic. Moss holds moisture directly against the Shingle surface for extended periods, which accelerates the loss of the protective granule layer and can shorten the usable life of the roof over several years. It’s most common on shaded, north-facing slopes under heavy tree canopy, which is why certain Toronto neighbourhoods with mature trees see it more consistently than newer, less-treed areas.

Can I pressure wash moss off my Shingles? This is worth avoiding in most cases. Most major asphalt Shingle manufacturers caution against pressure washing because it can damage Shingles, remove protective granules, and may affect warranty coverage if the roof is damaged by improper cleaning. Homeowners should always follow the maintenance recommendations published by their specific Shingle manufacturer rather than defaulting to a pressure washer.

How do I keep squirrels and raccoons off my roof? The most effective single step is maintaining the same 6–10 foot clearance between branches and the roofline that helps with abrasion and moss — animals typically access a roof by walking across a branch rather than climbing the side of the house. Beyond that, sealing gaps at Soffit, Fascia, and vent covers, capping the chimney, and removing food sources like accessible bird feeders all reduce the incentive for wildlife to investigate further.

What size tree is protected under Toronto’s bylaw? Any private tree with a trunk diameter of 30 centimetres or more, measured at 1.4 metres above ground, is currently protected. City Council has endorsed, in principle, lowering that threshold to 20 centimetres, though that change requires a further implementation report before taking effect. Trees on City streets are protected regardless of size, and a new Distinctive Tree Category adds extra protection for private trees over 61 cm starting September 1, 2026.

Why do gutters near mature trees clog so much faster? Trees close to a roofline drop leaves, seed pods, twigs, and needles directly into open gutters throughout the growing season, and this debris packs down into a dense mat that ordinary rainfall won’t clear on its own. Blocked gutters cause water to back up at the eave rather than draining, which contributes to prolonged dampness in summer and ice damming in winter, since melting snow has nowhere to go and refreezes at the roof edge.

Can leaves clog roof vents, not just gutters? Yes. Ridge vents, roof-mounted vents, turbine vents, and plumbing stacks all have narrow openings that leaf fragments, needles, and nesting material can partially block. Once that happens, the attic’s airflow is reduced, which raises attic humidity, encourages condensation on the roof deck, and can lead to mould over time — along with higher cooling costs in summer, since trapped heat has nowhere to escape.

Do tree branches damage a chimney? Yes, in a few specific ways. Branches rubbing against masonry wear down mortar joints over time, much like they wear down Shingle granules. A branch that provides easy access to the roof also makes the chimney cap a common target for raccoons and birds looking for a way into the attic, and flashing at the chimney base is one of the roof’s most failure-prone points when debris lands nearby or moisture is trapped by overhanging branches blocking sun and airflow.

Are dead ash trees more dangerous than other dead trees? Not inherently more dangerous once dead, but ash trees affected by the Emerald Ash Borer often become structurally unpredictable while they’re still declining, well before they look obviously dead from the ground. Because the beetle is actively established in Toronto, a mature ash showing any signs of dieback is worth having assessed by a certified arborist rather than waiting for more obvious decline.

Conclusion

Mature trees are one of the reasons Toronto’s neighbourhoods are so desirable. With regular maintenance, informed planning, and a basic understanding of how trees interact with your home, you can enjoy their benefits while minimizing the risks. The goal isn’t choosing between healthy trees and a healthy roof — it’s maintaining both for decades to come.

The fix, in almost every case, isn’t removal. It’s routine clearance pruning, regular gutter cleaning, an annual look at the roof from the ground, and knowing which side of the insurance line a given problem falls on before it becomes an expensive surprise. For anything involving a protected tree — work near the trunk, significant pruning, or removal — a quick check with the City or a certified arborist before starting saves a lot more trouble than it costs. And if any of this turns up something worth a second opinion, Right Choice Roofing and Repair has been walking Toronto homeowners through exactly these calls since 2007.

Recent Posts

Roof Repair in Toronto? We'll Fix It Right — Guaranteed.

From missing Shingles and active leaks to Flat Roof repairs and Slate Roof restoration, Right Choice Roofing and Repair has been fixing roofs across Toronto since 2007. We show up on time, use quality materials, and back every repair with a 2-year workmanship warranty. Don’t wait until a small problem turns into a costly replacement — call us today and let’s get your roof sorted out fast.

We Service the Greater Toronto Area and include

    • York, Ontario
    • High park, Ontario
    • Roncesvalles, Ontario
    • Bloor West Village, Ontario
    • The Junction, Ontario
    • Parkdale, Ontario
    • Mimico, Ontario
    • Yorkville, Ontario
    • Rosedale, Ontario
    • Forest Hill, Ontario
    • Summerhill, Ontario
    • Davisville Village, Ontario
    • Willowdale, Ontario
    • Newtonbrook, Toronto
    • Don Mills, Toronto
    • Bayview Village, Toronto
    • Downsview, Toronto
    • York University Heights, Toronto
    • The Bridle Path, Toronto
    • Leaside, Toronto
    • East York, Toronto
    • Todmorden Village, Toronto
    • Pape Village, Toronto
    • Woodbine Heights, Toronto